Are you ready to point lace decor for Halloween? I have been creating for a while ago Halloween patterns.
My little girl is Halloween crazy and so every year, we try something fun out. From crazy costumes to accessories and home decor.
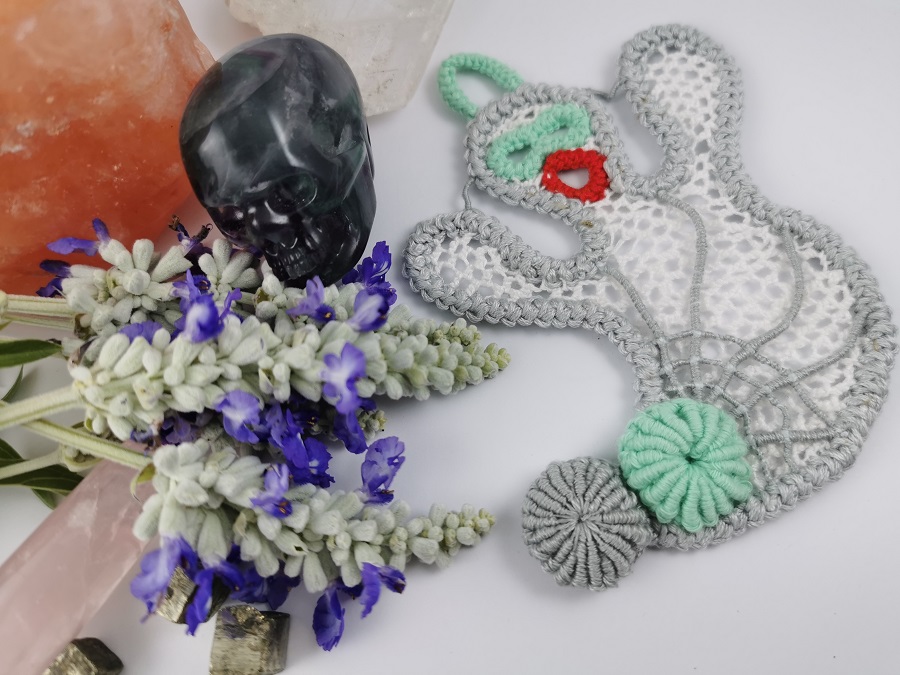
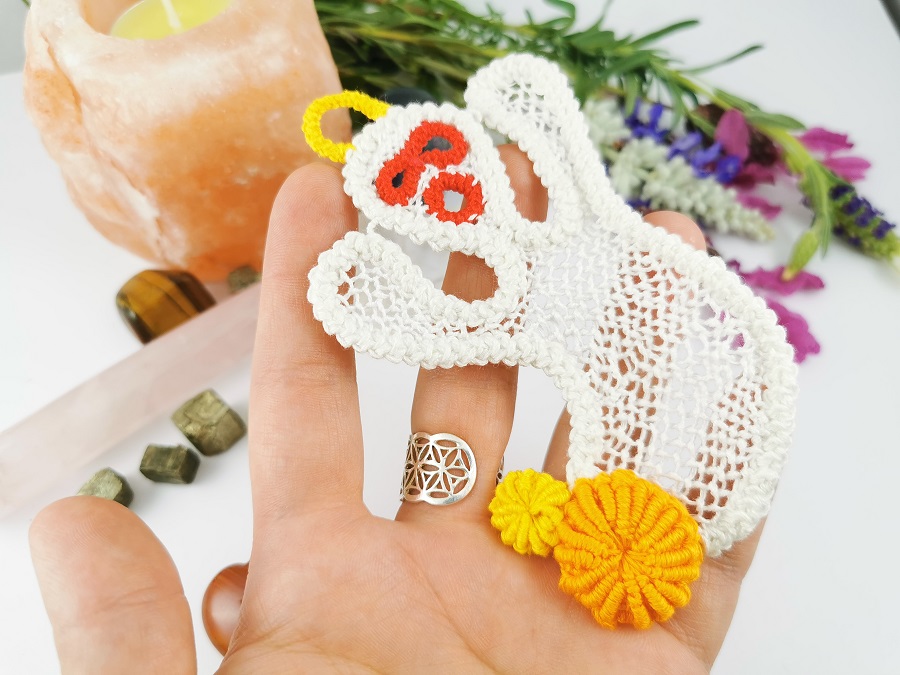
This year she will be Wednesdays from the Addams Family…and so we play with collars and hangman’s ropes….But the classic ghost is still a must, so here is a pattern available.
I remember when she picked the color combo…. an exciting time, coz she got to help out. I did a classic design First and then we went wild…
What do you prefer? Truly, I can’t make up my mind…
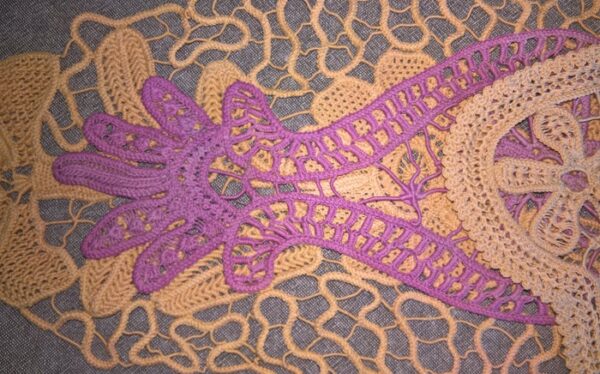
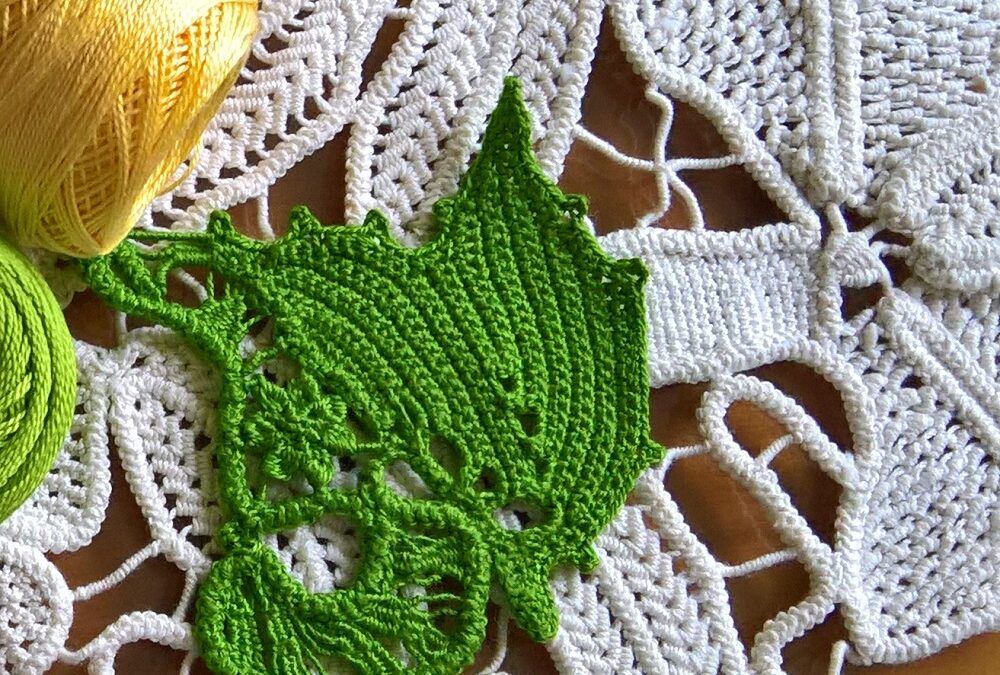
Also when it comes to Halloween, I like to add leaves, and here is one motive that turned out ok. To make it more interesting, I created a combo of crochet and Romanian Lace.
You can find the pattern in the store or on Etsy store HERE. Let me know, what would you like to create, a ghost or a leaf.
Also if you like to be updated with specific news from us, you can pick between Romanian Lace, Art or Reiki. Check out Bottom of page!
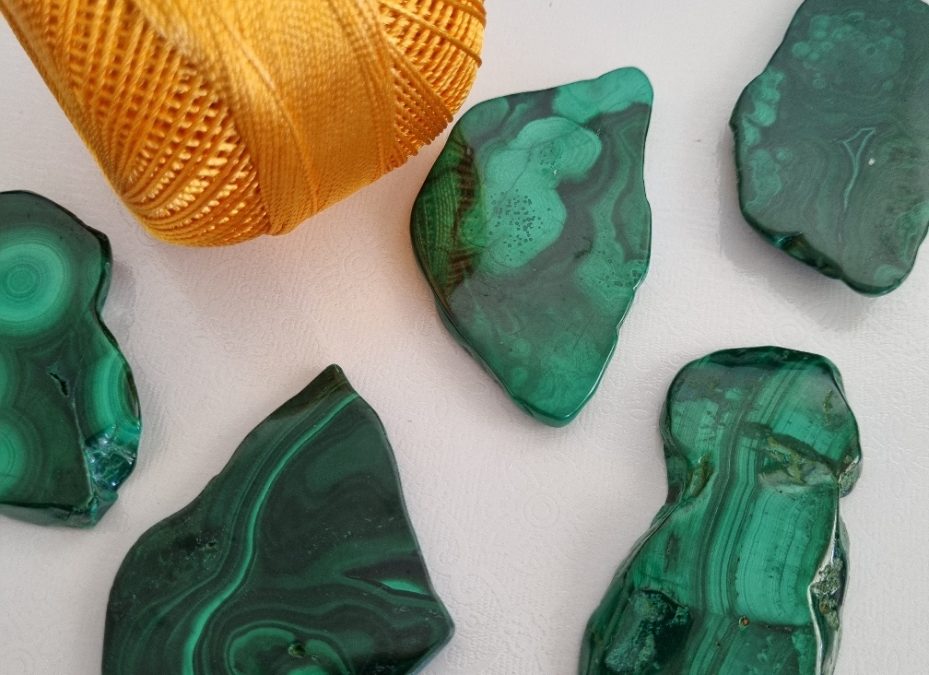
Malakos is known as the mirror of the soul. Malakos is the gorgeous crystal Malachite. From the Greek word soft it was and is always special. Holding great shades of green, malachite is pure magic. A crystal that does great in all its shapes. It has its charm unpolished but polished it reaches another level! Once it’s polished, you can actually see the gorgeous pattern. In ancient Greece, and Egypt Malachite was used as a protection stone and to extract green paint. In Russia, it was used by the czars to decorate the inside of castles to protect them from the evil eye. Malachites come from many places like Russia, Romania, Zambia, and Mexico.
Cleopatra used the green Malachite as her protection makeup.
The Czars in Russia used it for decoration inside the palaces and even had a malachite room in the winter Palace. It’s definitely gorgeous. Imagine the vibes!
But I bet you wonder how to use malachite… For sure as great as it looks, if you love hot baths, a malachite tub is not for you! It might look great, but over time cracks will appear in the malachite… Malachite, does not like water. Malachite is great for absorbing negative energy around you. It also calms your mind and gives a good feeling. The pattern has a hypnotic effect and makes you feel good inside. It also builds confidence and helps on the emotional level, when is also you might feel helpless, worthless, or empty. It is also a great helper when it comes to back pain.
Malachite is a stone of transformation and it can take your energy to another level. It has feminine energy that will transform into masculine energy if needed. Basically, this stone is your to-go stone if you need protection, support on all levels, emotional, mental, physical, guidance and positivity.
Malachite protects in fear situations and is great to have when flying, driving, etc…Malachite has many different names….you know it’s called Stone of transformation, also a soft healer but it’s also a stone used in the past by midwives. It protects women during birthing, pregnancy, and monthly period pain.
Malachite is fantastic when it comes to blood pressure, and deals with the heart chakra. Since it’s a healer stone, it eases the trembles when it comes to Parkinson’s.
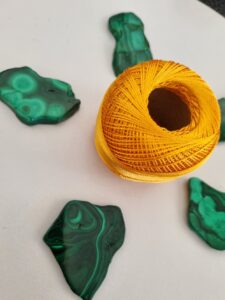
Now, you see Malachite is very versatile and great to use in many different areas, but it is really fascinating to use when it comes to abundance and wealth. That is one of the reasons I love to work with Malachite and transform them into a piece of art, wearable art. And so I want to combine my love of threads with this amazing stone. I will use malachite slabs and incorporate them with Romanian Point Lace, and 3D bullion elements and create a unique necklace.
If you ever wondered how I start a necklace that involves crystals…Here we go, first I cleanse and charge the crystal, after that, I start to incorporate it into the design. If it’s a custom design I incorporate the crystal into a grid as a center stone.
So you see, it does not matter, what goal you will wear for your malachite necklace, love, wealth, health, happiness, etc… it will always be a benefit to you!
Now the big question is what color should I combine with malachite? I love both salmon and light beige (has a silver touch to it).
If you visit my Instagram HERE You can find a reel about other great Malachite properties! So, let me know in the comment section what color you would pick salmon or beige!
Like you know I am always working on many projects at the same time like that Mondrian brooch, the Rosebud modern Romanian Point Lace doily, the lace mask, and the Rosa Canina with abstract vein elements, etc….
So let’s just talk lace for a minute….. Is your coffee hot? Mine is…. like you know I am a coffee addict!
Every time I create a piece of point lace, does not matter, if it home decor or a jewellery , an accessory, etc…. I want to tell you the best way to keep it clean, dust free, and long lasting.
Are you ready? Sure you are!
First of all each project needs it;s own place, while you work on it. I keep mine it little containers if I am at desk. If it;s on the go in a zip bag is best.
I don’t buy boxes unless it needs to be organised in the lace closets. Yes, I do have lace closets where everything is organised by colours, or projects or topics, art, books, threads, etc…..
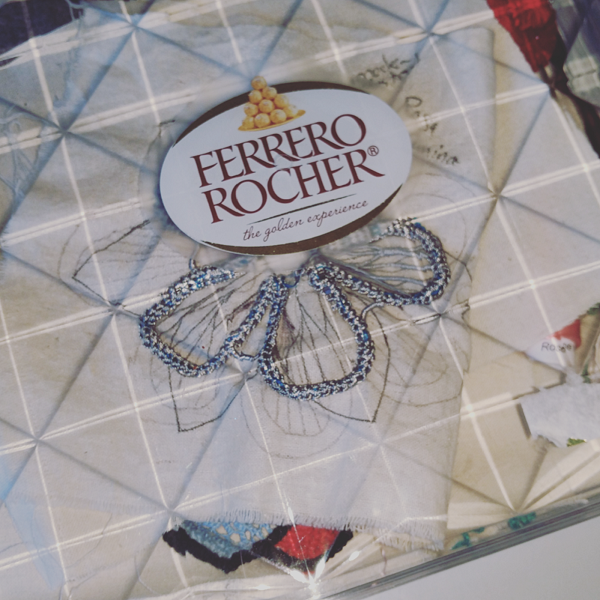
I use for example a fererro rocher square box once the chocolates are done, or an ice cream container once it;s empty. First of all you recycle, so nature check and second you save money!
These boxes are great and if they get damaged you do not feel sorry if you discard them, you did not spend a dine on it.
The other think is just in case you have little kids like me or pets, you can keep your project save and dust free. It’s easy to pick up and move it away or store it.
But now let me show you all the projects started!
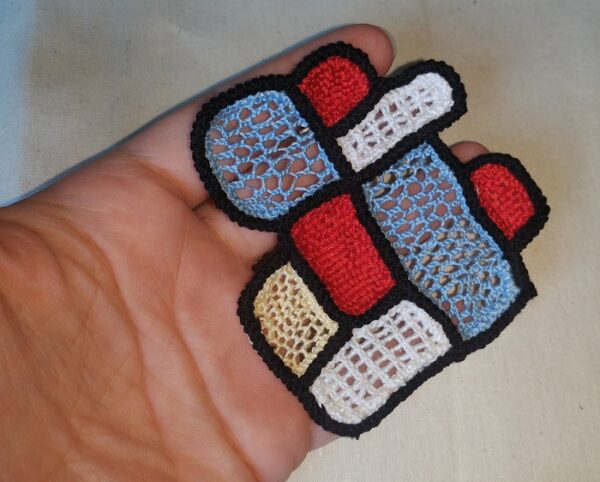
Mondrian inspired brooch! Loved to make the brooch and it will be a one of as far as I can think atm. If the interest is there, I might start a line. Let me know what you think about that!
It has a pin at the back and is fun to wear on something white or black!
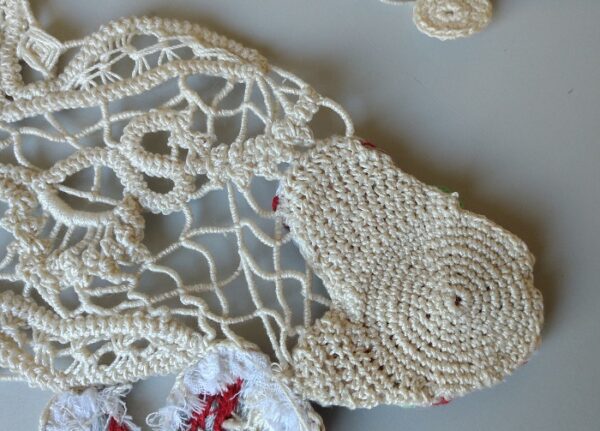
Now the other project if you remember, was the Rosebud modern Romanian Point Lace doily.
I finished the embroidery and once it was all in place, it was time to work on the back side of the doily.
The back part is simple crochet. There is no real pattern that I followed. You need to make sure that it;s neat and covers the back in an organic motion. See image.
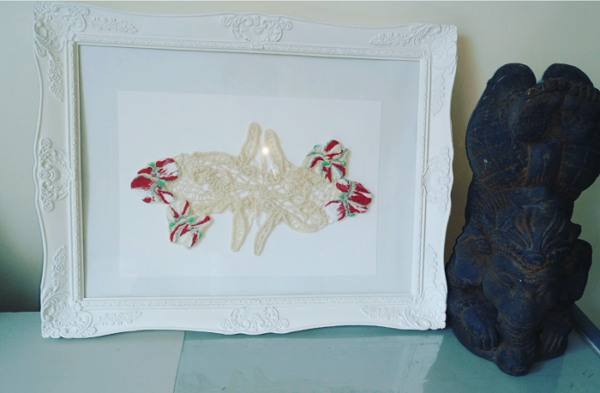
You can use the doily as a wall art, which I do mostly. So I framed it in a vintage style frame, like the one below or use it on a furniture piece or a tray, etc…. I am sure you find a fantastic use for it.
It;s very trendy atm to use crochet doilies as a dream catcher so why not with this type of doily?!
Sew around the edges of the rosebud embroidery designs and connect the crochet back part with the embroidery. Now you can steam clean or iron press the ready doily.
If you feel that you worked the doily a lot and the threads feels, or looks dirty, give it a quick hand wash. Make sure that you do not squish it very harsh and dry it flat on a towel. Once it;s air dry ( no dryer) you can start using it. If you feel the need to block it by all means do it. I have notes that with most RPL pieces it;s actually not necessary. BUT, said so, if you like it extra flat and stiff, of course you can block it. Here is how it looks in the frame.
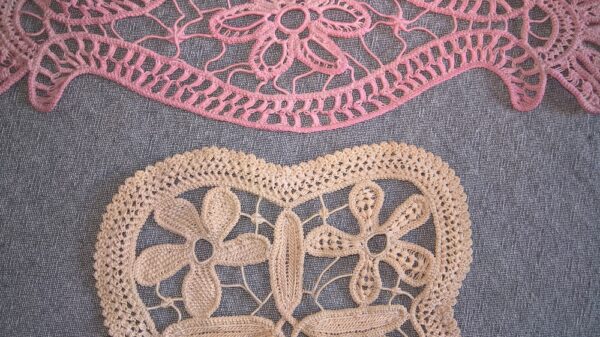
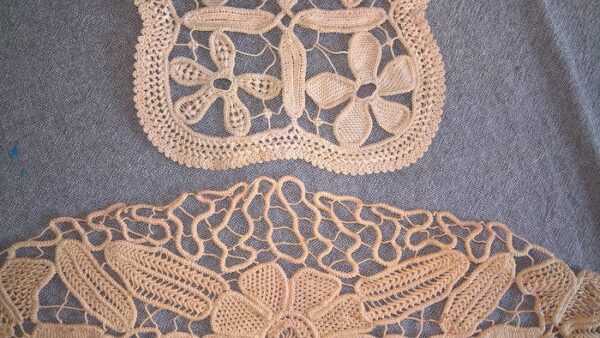
What I wanted to achieve it that the embroidery is at the edge of the doily. Normally in traditional RPL, the embroidery is only in the centre. Recently, it started to become trendy and more embroidery is added, in other places, like ending and between the cords.
The lace mask you have seen in the older blog post, but if you need a reminder, click HERE. It turned out gorgeous the mask and the little one was very pleased with it. I created a listing for it and it’s now available on ETSY as custom order.
The Rosa Canina floral design in traditional ecru and white from the last blog , click HERE, was just the beginning I think … I am very inspired to take this project a bit further and create something different with it. and so I experimented with different threads and styles. I used silk rayon and rayon silk threads- different sizes and colours. All is wip atm. The pink thread is pure silk and is from the UK DeVere Yarns. If you want to check them out, click HERE.
Is there a project you explore more? If yes, let me know!
Working with different types of materials, is sometimes a challenge and very interesting.
I know, Self Love is a big deal these last years, and I am still not sure if people really understand it or acknowledge how important it is and because we are all different, it will mean something different to all of us.
Sometimes we are so busy with our lives that we do not see outside the box… We drown in guilt, pain, sorrow, stress and so much more….. Stress is today such a big factor that we literary forget about our self.
I wan to share with you how I build up Self Love…..and what I do to take care of my mental state, my body and personal growth.
Step One
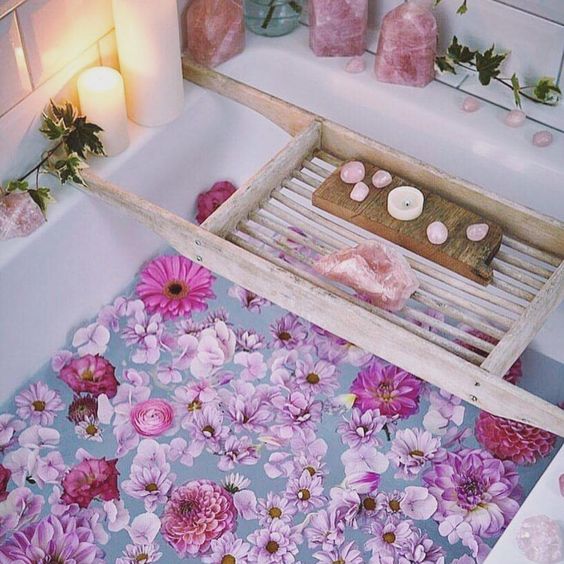
Find your happy place.….Yes, find your happy place… This could be your walk in closet, or a place at the beach, even your special place in the garden…. wherever it might be, make it yours. Sit there and do not think about tomorrow, or the bills you need to pay. You need to connect with yourself and bills, worries, stress are not welcome in your happy place!
My happy place is the bathtub. I know how that sounds, but it;s true. It;s simple, available and comfortable at home. From the economic point of view it;s great as well. So this is what I do. My happy place starts with a hot bath, where I add bath salts, some with lavender infuse, fresh herbs like sage from the garden, lemons and orange slices if I have in the house as well as flowers…. Now to this I add crystals, like Agate, Rose Quartz and Amethyst, Himalayan salt.
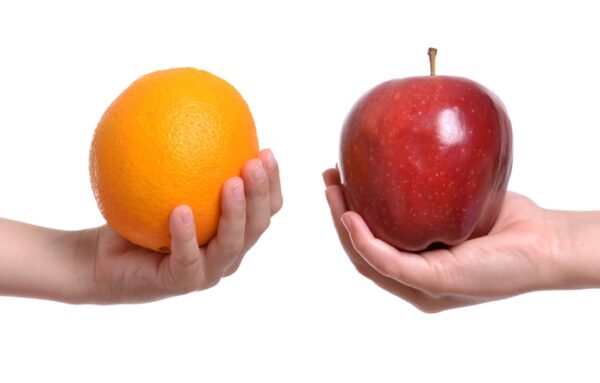
Step Two- No Comparisons
It is very important that we stop to compare our self with others. This goes for your work, your marriage, your parent style, everything you can think of. Once you let go of this, you will feel much better, not only for yourself, but you will discover that the freedom to create, the freedom to think free is back in your life.
I have done this and so have you! It’s just inviting bad energy in your life. Get rid of it, now!
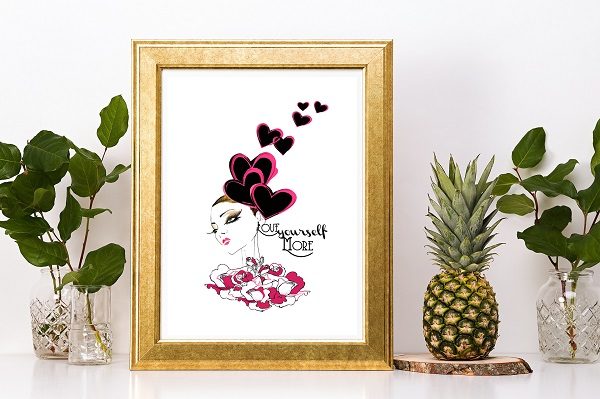
Step Three- Do something you are good at!
You need to find something you are good at. For me, it’s ART. It boosts the self -esteem and makes you feel great, productive and you gain a lot of positive energy when you do something you love. You are building self -love! If you are interested in this particular print to remind you the Self-Love is important click here. So if my thing is art, your might be pilates, cooking, or gardening. etc….
Step Four- Self Love Ritual
Yes, I know how that sounds, so do not roll your eyes , yet. This is what I do. It;s simple, and you might even laugh now. I give myself a hand / feet massage. It takes me about 20 minutes, where I unplug from social media, form radio, tv, etc… In total silence, I massage my hands and feet with oil or lotion. Once done, I treat myself to a spiky ball therapy. You can purchase them on ebay or in any sports store. I got mine from Aldi.
Step Five- Tackle your closet!
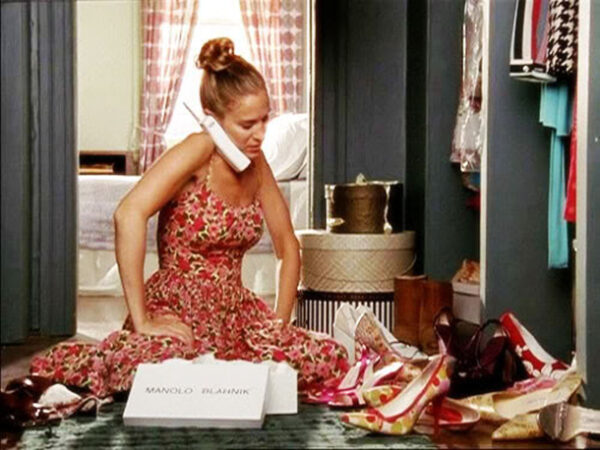
Yes, a clean self -love mind, starts with a clean organised closet. I am not the clean freak for sure, but I like my closet to be clean and organised so I can Organise and get rid off all the stuff that you do not need. Let go of it! It helps your closet and your mind. It will make you feel light and fresh. Shoes, Jewellery, clothes, etc… that reminds you of bad events or brings negative memories into your life, need to go!
I know we do not all have a Carry Bradshaw Closet, but we can make it all work with accessories and a good clean out! Make it work! You will see, how it will make you breath easy as soon as you are done!
I hope this helped you out that way it helps me to practice Self Love! How do you practice Self Love?
XO,
Lorena
All Images from Pinterest. Print image from the Etsy shop.
It all started on a Thursday evening …. I wanted to dye some RPL pieces, and was not sure if I had all the right ingredients. The idea that I wanted to dye with natural items was logic to me from the start. From the beginning I was fixated on pink shades.
It’s Friday morning and once the little one went to take a nap it was time to start the dye process……
To dye doilies, lace, point lace is as old as time…. I am very much interested in natural dye and always experimented with it, from teas, to coffee dye…..
I had three white natural Romanian Point Lace doilies. You probably have seen them in one older post or on social media…
Here they are before, the dye adventure!
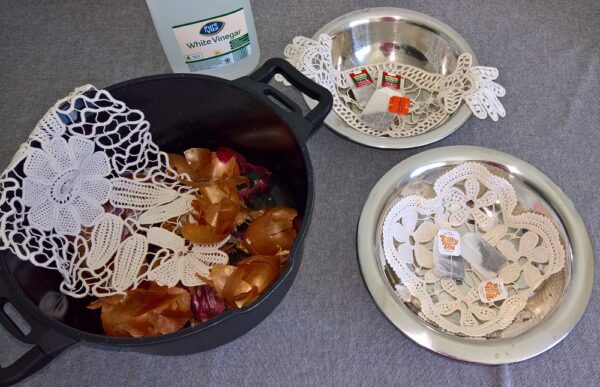
You do not need much for a natural dye. A few bowls, pots to bring it to a boil, and of course vinegar. I use the very cheap one dollar vinegar.
That’s about I guess and yes like with every dye, X fingers, that it comes out ok! LOL
Since I dye only 3 pieces to experiment with colours, I do not need much.
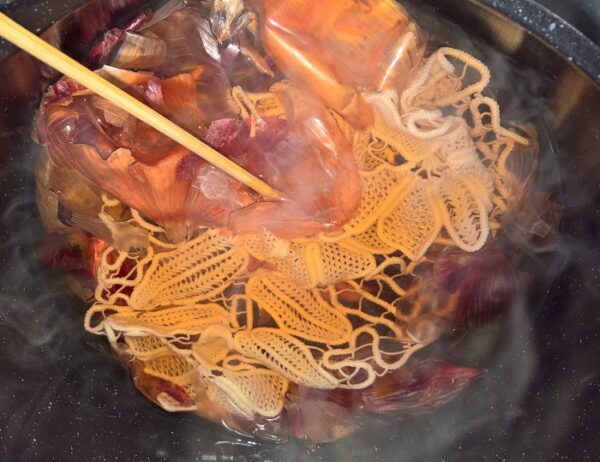
For the onion dye I used all the left over onion shells red and brown that we had left in the house. In this case it;s about 2 hands full. The more the better, but like I said it;s all left overs.
I used two hibiscus and one rose hip teabag to dye the second Romanian point lace doily. For the last doily I used two bags of Billy teabags. It;s Australian Bush tea. The colour is dark brown.
Step One!
I soaked all three doilies in cold water for at least 15 minutes.
Step Two!
After that I started to boil water and to get the pots ready.
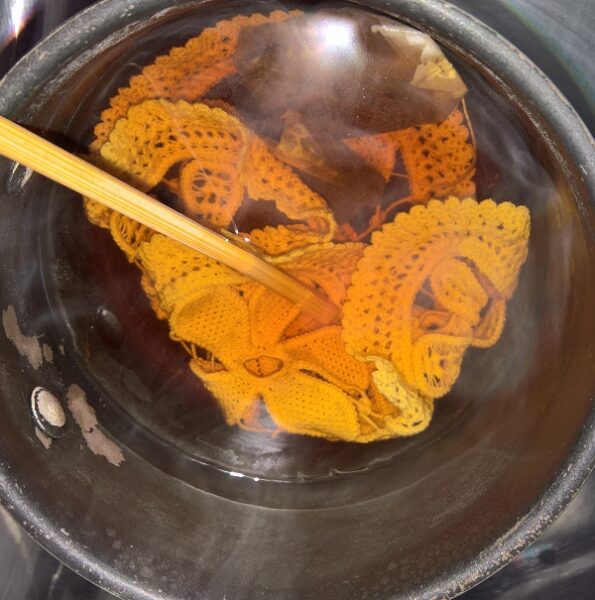
You will need three posts and half a cup f vinegar in total. Add to each pot a bit of vinegar and let it boil. Make sure that the water is not over boiling. I add wooden spoons to each pot.
Step Three!
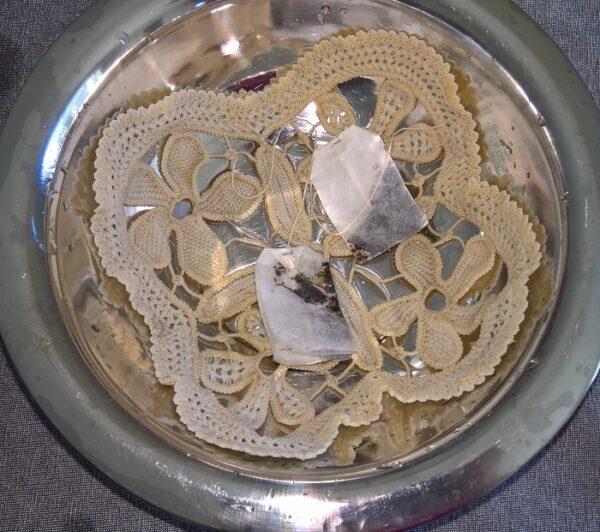
Bring it to a boil and make sure that the doily is deep in the hot water. Stir is a bit and also be careful when you turn it. It need to be in hot water and in the dye all the time. If edges of the doily is out, you will have a weak dye. Love how the dark red actually looks like.
The Billy Tea is fantastic , a gorgeous colour, very elegant
almost like cognac.It looks nice so far. I can imagine that it will turn way lighter of course. It’s never easy to say if you experiment and if you do it with Romanian Point Lace pieces. If you are not sure, I suggest to experiment with a simple Romanian Point Lace cord. Cut it in pieces and add into each colour. That way you will not loose or damage a doily if you need it later on. After all you were quite busy creating it. 🙂
Make sure that the stove is on medium to high but watch it all the time. While the doilies are wet, the dye looks darker, see images below. Once it;s dry they will lighten up!
Hibiscus, has a light colour once dry and a very soft smell. It will not smell once it;s dry. The onion dye is stronger in colour. The tea is quite faded but a good outcome. Soft, and delicate with a vintage touch!
Step four!
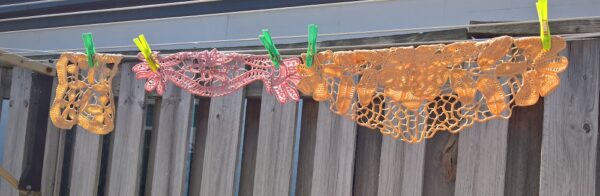
Once ready, you can hang them outside on the line to dry. But if you can’t wait, you can iron them dry. That way you are one step ahead and you do not need to block it, since you pressed them while wet.
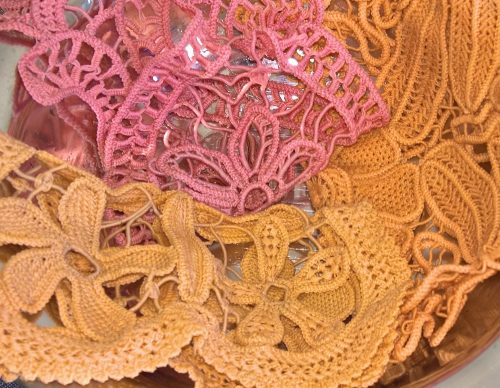
E voila…. this is the result of this dye. Have you tried to dye your Romanian Point Lace? If yes, please let me know.
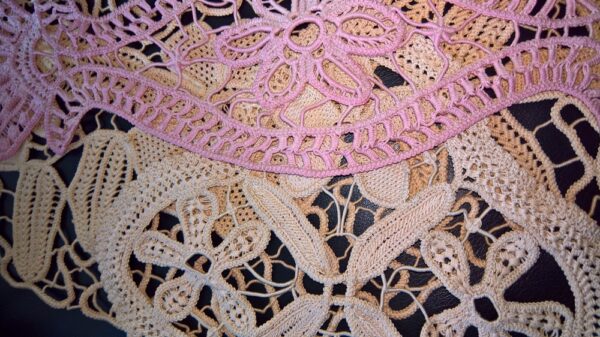
As you can see the hibiscus tea resulted into a very pale pink. It is gorgeous, but soft. If you would be interested in a deeper pink, you might need to add more hip rose tea bags, or avocado seeds and shells.
I enjoyed to dye all three, but I think I would be very interested to dive deeper into natural dye on the pink side. I hope you all had fun reading this blog post and please so share it, pin it, like it and comment!
I like the idea that I can do Romanian Point Lace in light or white colour, due to the fact that the fillings are easier to create on lighter thread. It also means that I have the freedom to experiment and change colours as much as I like by changing the dye. It’s easy if you look for a specific colour that you can;t find in the store.
Saturday I had another look at the result of pink and I was not really happy with it. Starring at it while eating blueberries gave me the idea to actually dye the same piece in blueberry.
Once finishing with making blueberry juice for Andrada, I used the left over and added vinegar. The doily was 30 minutes in the hot juice and this is the result….
The pink is darker, more into a purple note…. I love the result.
Sign Up Now and you will receive 15% OFF your first order PLUS grab 4 FREEBIE including My morning routine Reiki principles, Palm Chakras Activation, Thread_Yarn Cheat Sheet and a print and art journal mood trackers.
Thank you for subscribing. Please use the discount code SIGNUP15 on checkout. An email is also on the way with your FREEBIES.


 Malakos is known as the mirror of the soul. Malakos is the gorgeous crystal Malachite. From the Greek word soft it was and is always special. Holding great shades of green, malachite is pure magic. A crystal that does great in all its shapes. It has its charm unpolished but polished it reaches another level! Once it’s polished, you can actually see the gorgeous pattern. In ancient Greece, and Egypt Malachite was used as a protection stone and to extract green paint. In Russia, it was used by the czars to decorate the inside of castles to protect them from the evil eye. Malachites come from many places like Russia, Romania, Zambia, and Mexico.
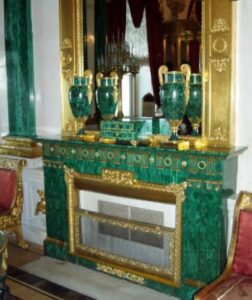 The Czars in Russia used it for decoration inside the palaces and even had a malachite room in the winter Palace. It’s definitely gorgeous. Imagine the vibes!
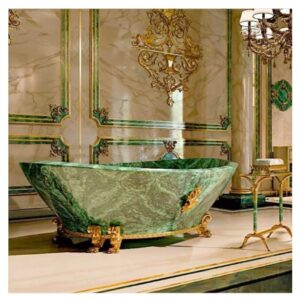 Malachite is great for absorbing negative energy around you. It also calms your mind and gives a good feeling. The pattern has a hypnotic effect and makes you feel good inside. It also builds confidence and helps on the emotional level, when is also you might feel helpless, worthless, or empty. It is also a great helper when it comes to back pain.
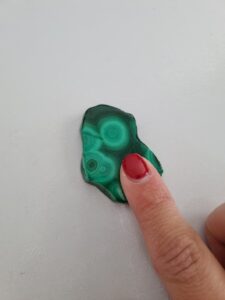

 What I wanted to achieve it that the embroidery is at the edge of the doily. Normally in traditional RPL, the embroidery is only in the centre. Recently, it started to become trendy and more embroidery is added, in other places, like ending and between the cords.
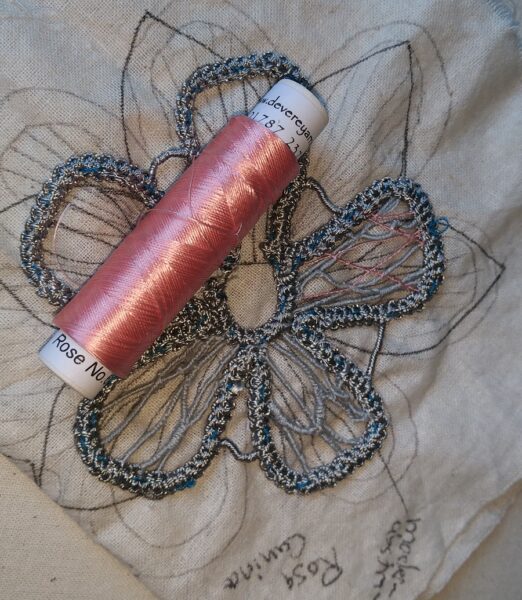

 You do not need much for a natural dye. A few bowls, pots to bring it to a boil, and of course vinegar. I use the very cheap one dollar vinegar.


 Saturday I had another look at the result of pink and I was not really happy with it. Starring at it while eating blueberries gave me the idea to actually dye the same piece in blueberry.